
Welcome to Image Approvals! If you have a production account, this handy little guide will walk you through everything you need to do.
1- LOGGING IN:
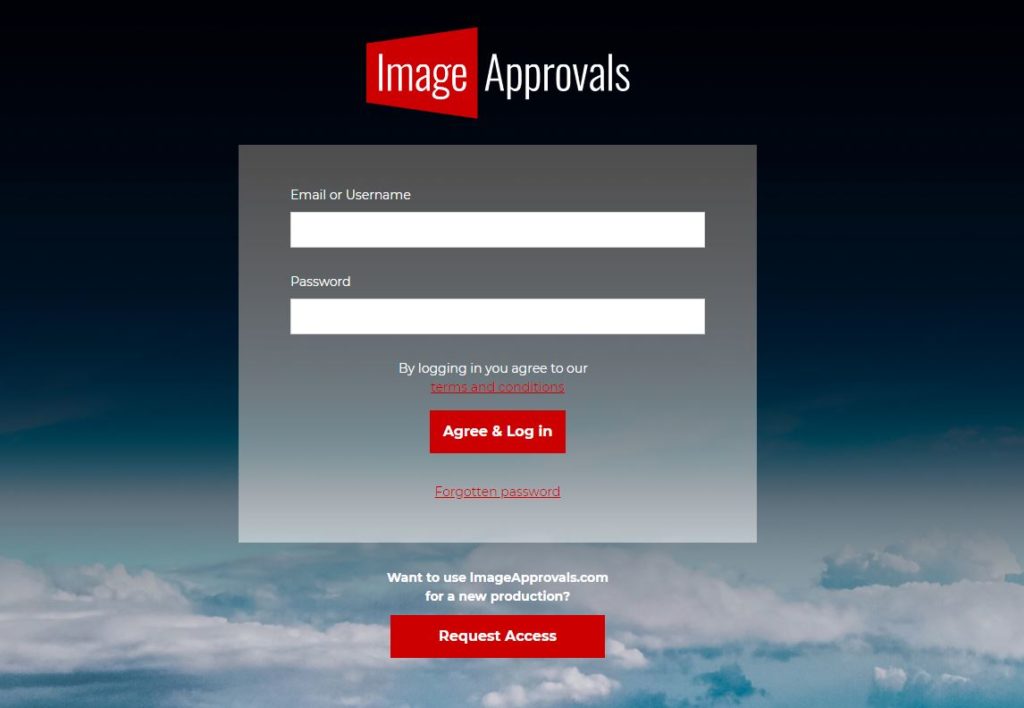
To log in, visit app.imageapprovals.com and type in your username and password.
If you are having problems logging in, please navigate to “I cant log in“.
______________________________________________________________________________
2 – VIEWING PRODUCTION STILLS:
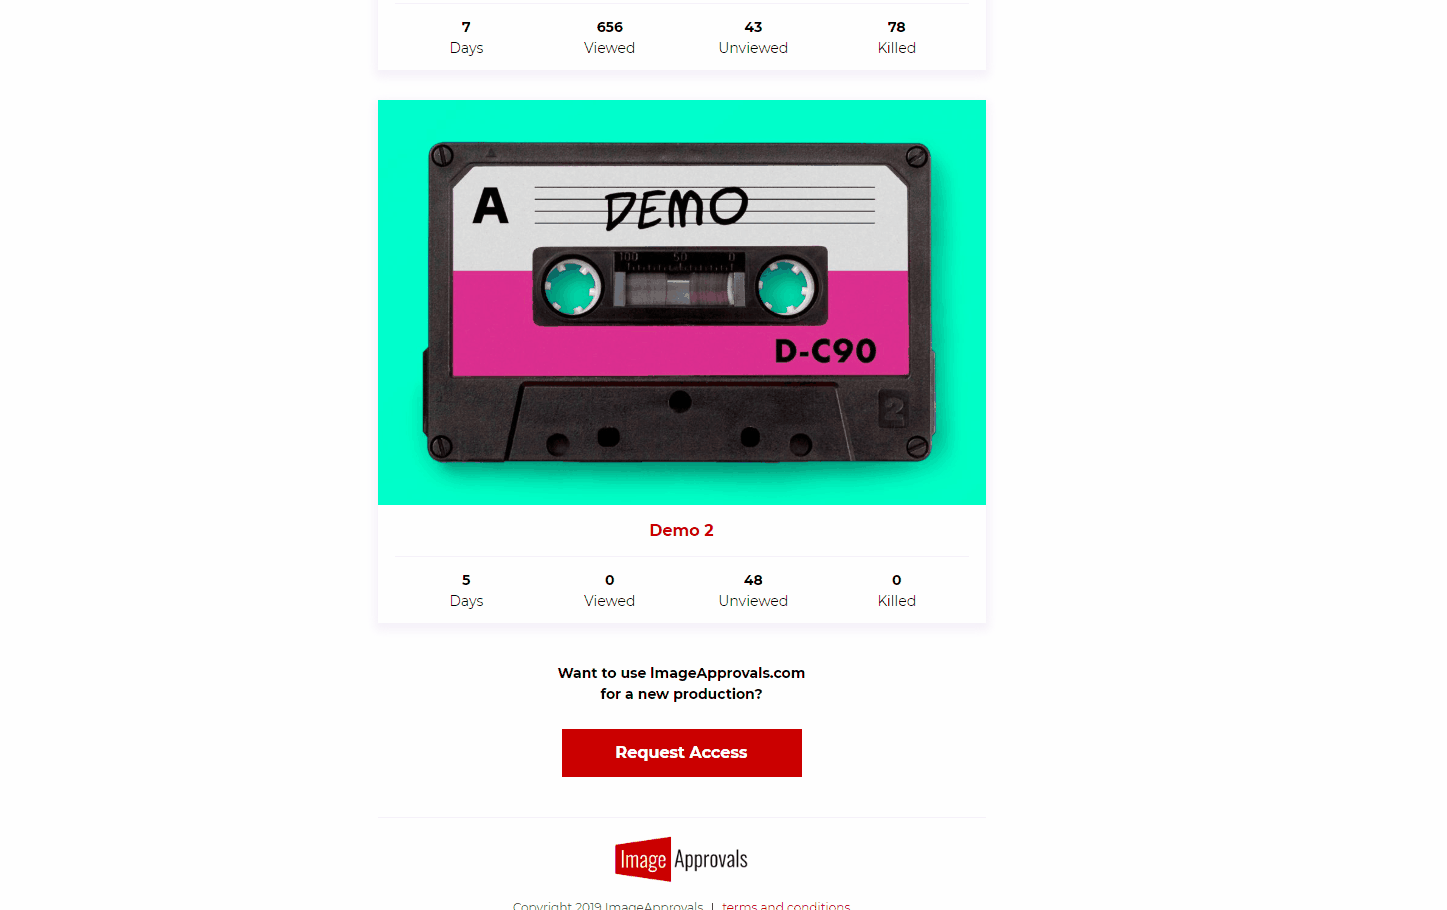
Once you have logged in, select which production you would like to view. You will then see a list of image folders that have been uploaded. These are typically arranged by shoot day but may also be arranged by episode or any other preference specified by the project lead at the start of the project.
Day List
From here you can see which actors have completed their approvals for which days, and which actors you are waiting for.
Thumbnail Folder
Select a folder to view thumbnails of the day’s stills and click on the thumbnails to view the images individually.
Individual Images
You can use the tabs at the top of the page to switch between unviewed, viewed, killed, and all images; as well as use the drop-down filter to view images with specific actors in. So that you don’t have to waste time viewing images twice, we will automatically open the unviewed tab each time you open a set of images so you can continue right from where you left off.
Unviewed: images your account has not viewed and which have not been killed by any user.
Viewed: images you have already viewed but which have not been killed by any user.
Killed; images that have been killed by any user.
All; all images together regardless of their viewed or kill status.
Zooming in and out:
On tablet and mobiles:
You can zoom in and out of images by pinching the screen.
On desktop (Windows):
Hold down CTRL and then press the + or – key to zoom in and out.
If you have a mouse with a centre wheel, whilst holding CTRL you can also use the wheel to zoom in and out instead of the + or – keys.
On desktop (Mac):
Hold down the Command key and then press the + or – key to zoom in and out.
If you have a mouse with a centre wheel, whilst holding Command you can also use the wheel to zoom in and out instead of the + or – keys.

_______________________________________________________________
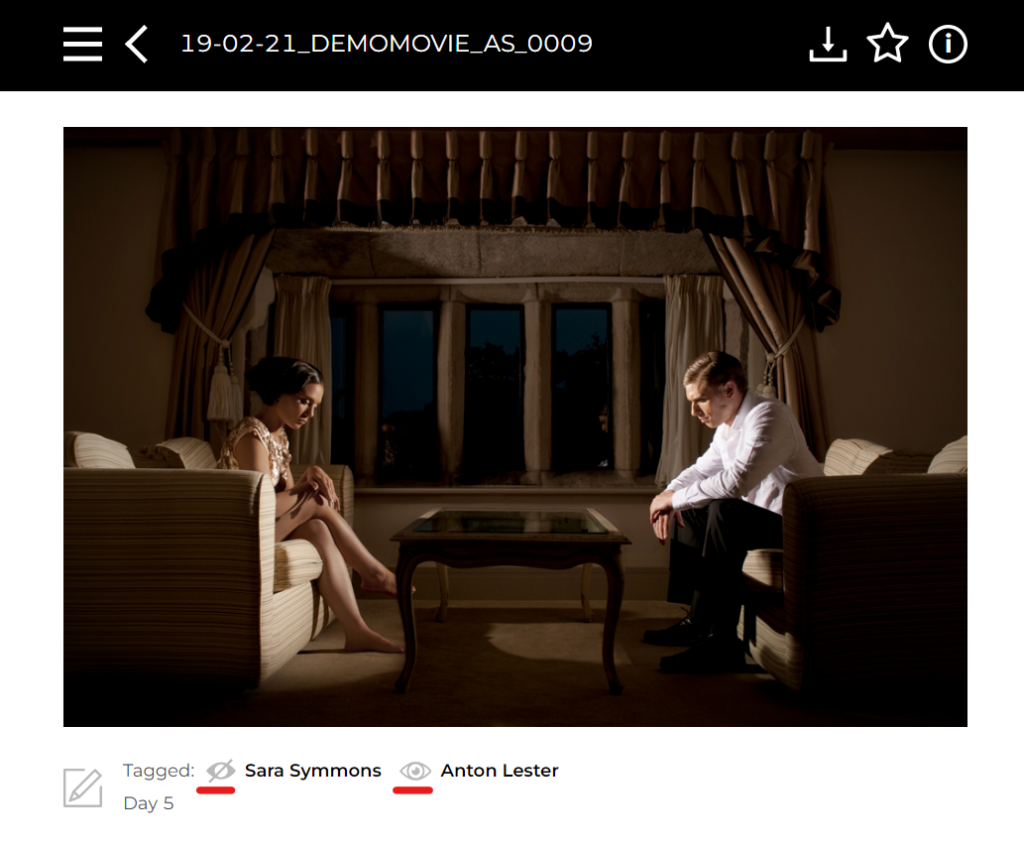
3 – CHECK YOU ARE HAPPY WITH ACTOR TAGS
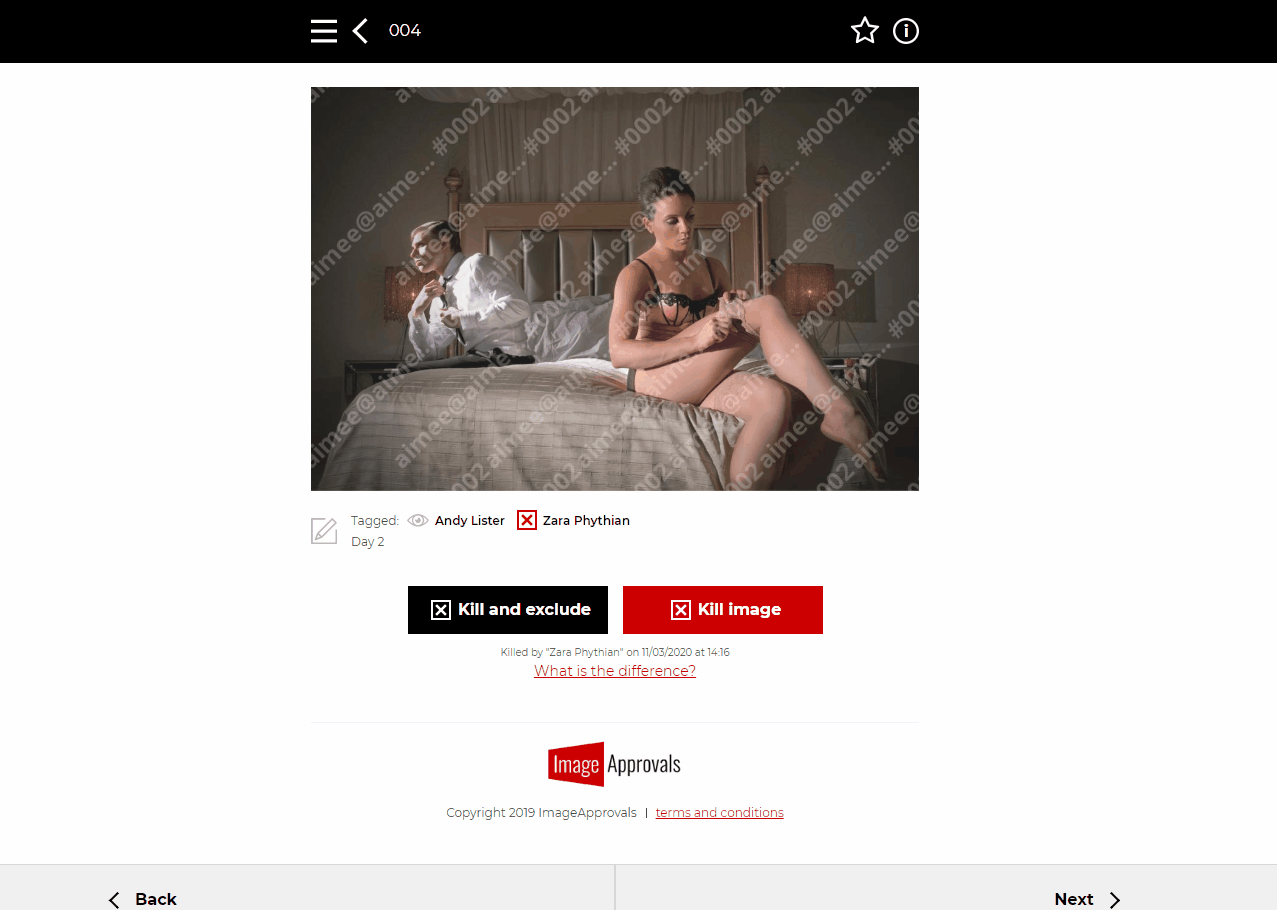
Though you can see all of the images on the platform, each actor will only see the images in which they have been tagged. Before you grant access to your cast, please check you are happy with how the actors have been tagged. For instance, an actor may not have been tagged into an image if their face is deemed sufficiently obscured.
If you would like to add or remove an actor tag from an image you can do so in the following way:
- Click on a shoot day, and select the image you want to change tags for.
- Beneath the image, you will see an edit icon. Click this and use the drop-down box to tag the actors who appear in the image.
- To remove actor tags, click the bin icon to the right of their name. Remember; adding an actor tag will enable that actor to see the image, and removing an actor’s tag will prevent them from seeing that image.
The actors’ image totals and percentages will automatically adjust accordingly; this may cause actors to exceed their contracted percentages should you do this after they have made their kills so make sure all tags are complete and signed off before giving access to your cast.
Only use this to amend tags; if you’d like to curate your images before they are given to cast, jump to the next step.
______________________________________________________________________________
4 – EXCLUDING IMAGES
The final step before giving access to your cast is to exclude any images you do not want them to see.
You can do this by clicking the black Kill and Exclude button that you’ll find beneath each image. Once clicked, you’ll be automatically moved to the next image. To undo this, simply go back to the image and click the green unkill button.
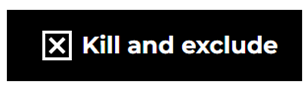
Images that are excluded are marked as killed and will not be visible to the actors and will not count towards their total. If you click the red Kill button instead, the image will be marked as killed but still be visible to actors and be counted in their totals. In this case, the actors will not know the image has been killed.
______________________________________________________________________________
5 – TRACKING ACTOR PROGRESS
Once you’ve given actors access to begin their photo approvals online, you don’t need to do anything until they have completed the process. You can keep an eye on their progress in two different ways.
Days marked as done:
When viewing the list of shoot days/image folders, you can see which actors have marked each day’s approvals as done and who you are waiting for.

Summary Box:
Clicking the Summary Box icon in the top-right corner reveals a clear, real-time overview of image approvals. Instantly see how many images have been approved as selects, how many remain un-killed, and track each cast member’s kill allowance across solo and group appearances. It’s a fast and efficient way to stay updated on cast activity during the approvals process.
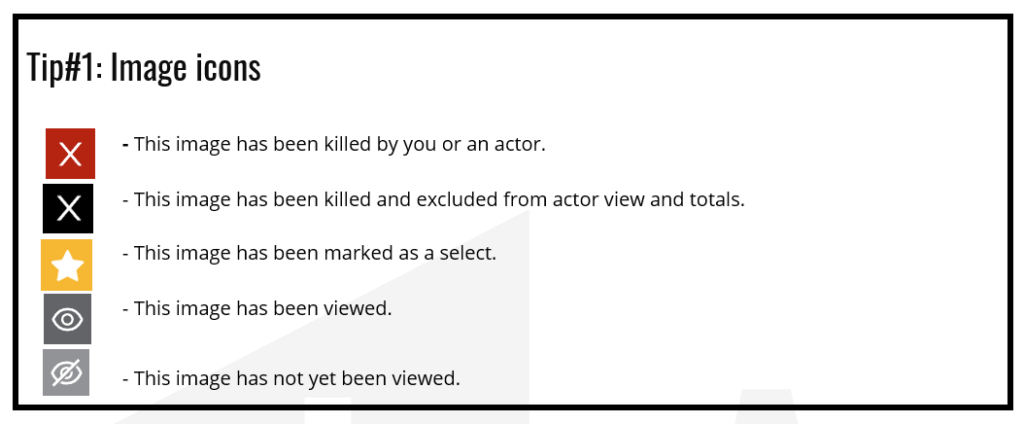
Viewed icons:
You can see if an actor has viewed or killed a specific image by looking at the icon next to their name below the photo.
Sometimes, an actor may have forgotten to mark their days as done, so checking out the last few images they appear in can be a quick way of ascertaining if they have viewed all of their images and just forgotten to hit the mark day done button.
_______________________________________________________________________
6 – MARK YOUR SELECTS FROM APPROVED IMAGES
Once all of your cast have marked their approvals as complete it’s time to mark your selects. If you don’t need to mark any selects, that’s fine. Just let your Image Approvals contact know and they will take care of the rest. For those who do, follow the steps below to view the approved images and select your favourites:
- Open the menu and navigate to the Killed and Unkilled page.
- You’ll see the following tabs for image status:
- Killed – all images that have been vetoed (killed) for that day
- Unkilled – all images that have not yet been killed, regardless of whether the day has been marked as “done”.
- Approved – a subset of un-killed images from shoot days that all actors have marked as done
Note: The drop-down menu for the Approved tab will only show shoot days that have been marked as done by every actor appearing in those images. If even one actor hasn’t marked a shoot day as complete, it won’t show up here. That’s why we recommend using this guide only after all cast members have marked their days as done.
- Click on the first thumbnail to view the image and navigate through the approved photos for that day using the cursor keys or by clicking the left of the image to go to the previous photo or the right of the image to move on to the next photo.
- If there is an image you would like to mark as a select, just click the yellow star icon at the top of the screen. Click it again to undo your choice.
- To review your selects, simply open up the menu and navigate to the Selects page, choose your preferred status tab and use the drop-down menu to choose the day you’d like to view the selects for.
For further information please visit How to mark selects from cast approved images
______________________________________________________________________
7 – APPROVALS COMPLETE – Delivery
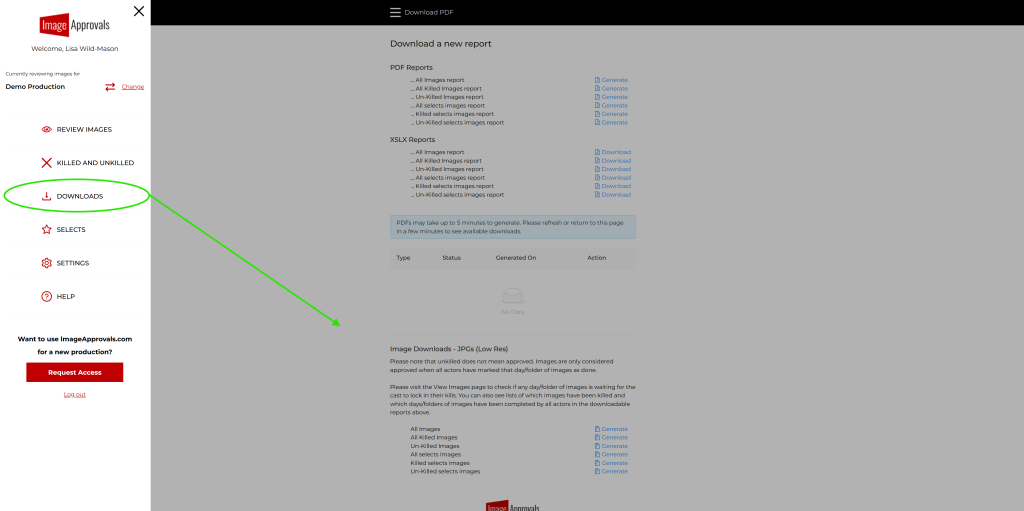
We take care of the rest! We will organise your images into Killed, Approved and Approved Selects folders and send them back to you with a complete set of reports.
Should you want to, you can also access these reports at any time by logging into the platform and navigating to the Downloads page. Handy if you want to quickly share a contact sheet of your approved selects with other stakeholders.
Due to the large numbers of images associated with a production, it may take a little while for PDFs to generate once requested so feel free to continue using the platform whilst you wait. Once your documents are ready to download, they will appear at the bottom of the downloads page.
______________________________________________________________________
8 – Platform Image downloads
Production users can now download bulk image sets directly from the Downloads page in the Image Approvals platform. If downloads are enabled, Production users can access all sets of images related to the production, including All Images, All Killed / Un-Killed, Images and All Selects / Killed Selects / Un-Killed Selects. Once a request has been made to download a set of images by clicking ‘Generate’ a zipped folder will download to your selected location, please note this may take a while due to the file size.
______________________________________________________________________________
ADDITIONAL FEATURES
You might also find these links useful:
How to remove actor tags or hide images from actor view.
How do I zoom in and out of images?
How do I remove watermarks from images and reports?
Can I see approved images without downloading a contact sheet?