
If you haven’t already, download your free version of Adobe Bridge – you will need this in order to convert your images using the method below.
(See why you should use the perfect duo of Image Approvals and Bridge here.)
This guide will show you how to create low res JPGs from RAW files. To learn how to create full res JPGS from RAW files simply follow the steps below but set the Image Quality to its maximum and make sure you have Scale Image: 100% selected and not Resize to Fit.
If you have the paid version of Adobe Bridge with access to the Camera Raw plugin, jump to here for another way to convert your RAW files to JPGS, that is even quicker!
How to create JPGS from RAW files using the Export Panel in Adobe Bridge
Step 1: Open Bridge and select your images
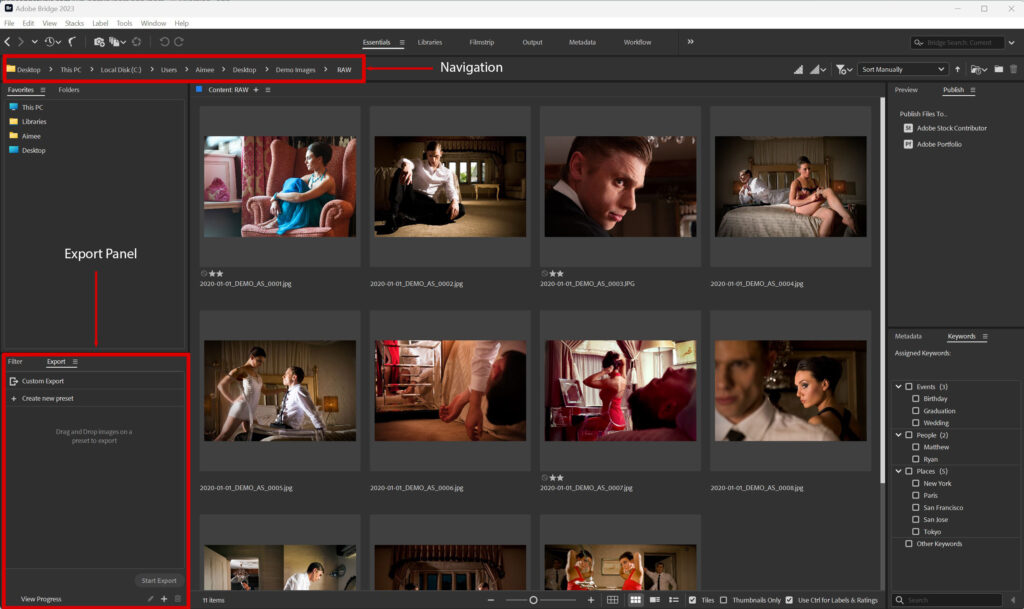
Open Adobe Bridge and use the navigation bar at the top to navigate to the folder of images you would like to create low-res JPGS for.
Step 2: Create an export preset
On the left of your workspace you should see a panel called Export. If you cannot see this, you may need to add it to your workspace.
To add an export panel to your workspace on Adobe Bridge, click on Window at the top of the screen and select the export panel. This should now appear in your workspace.
Once you can see the Export panel, click create new preset and you should see a configurable modal pop up.
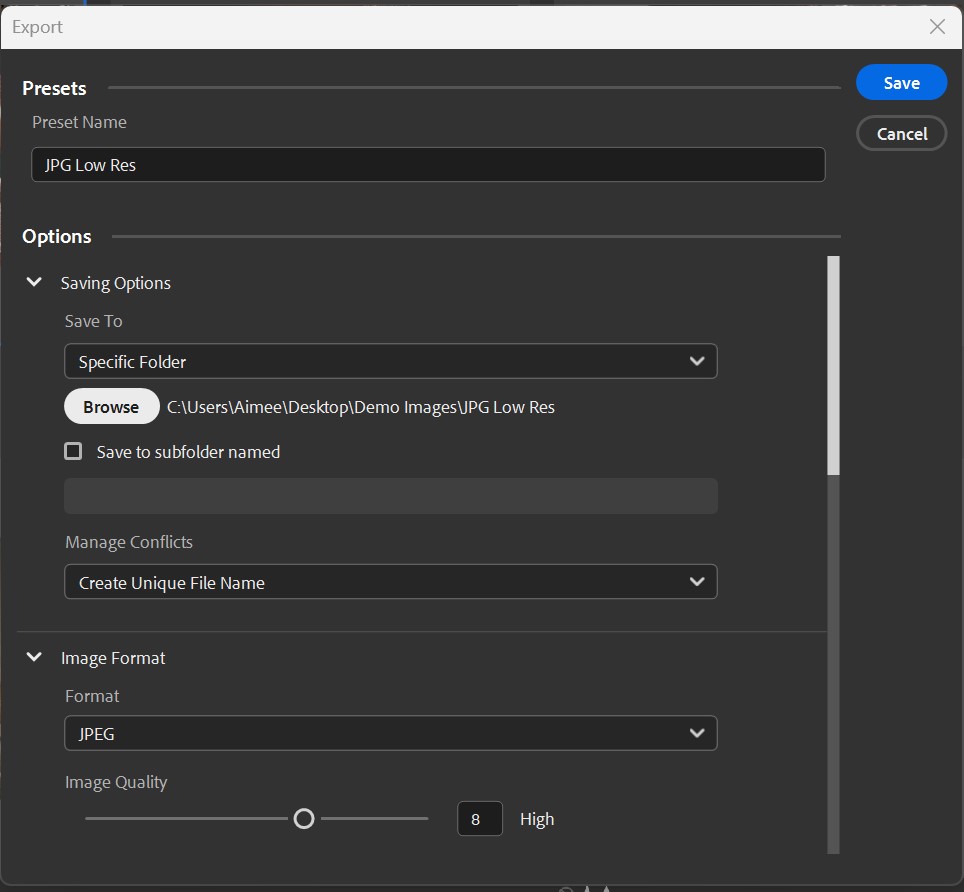
Name your preset something like “JPG Low Res” so you can easily identify what this preset will do when you want to select it later. Then select the folder to which you would like Bridge to save the JPGS you create.
To keep the filesize of the images under 500kb in size (the maximum file size that can be uploaded to the Image Approvals platform), select an image quality of 4 or lower.
To set the maximum length of the images, select the Resize to fit box and pop the length you want to use into the Dimensions box. If you are creating low-res JPGS to upload to the Image Approvals platform, make sure this is set to 3000 pixels.
Finally, click include original metadata to ensure that the information you have stored in your RAW file is copied to the new JPG files, then click save.
Step 3: drag and drop your RAW files
Now that your preset has been made, all you need to do is to select your RAW files and drag and drop them into the preset and click the start export button below.
Bridge will now create low-resolution JPG copies of your RAW files and save them to the folder you specified when making the preset.
Step 4: double-check your file sizes
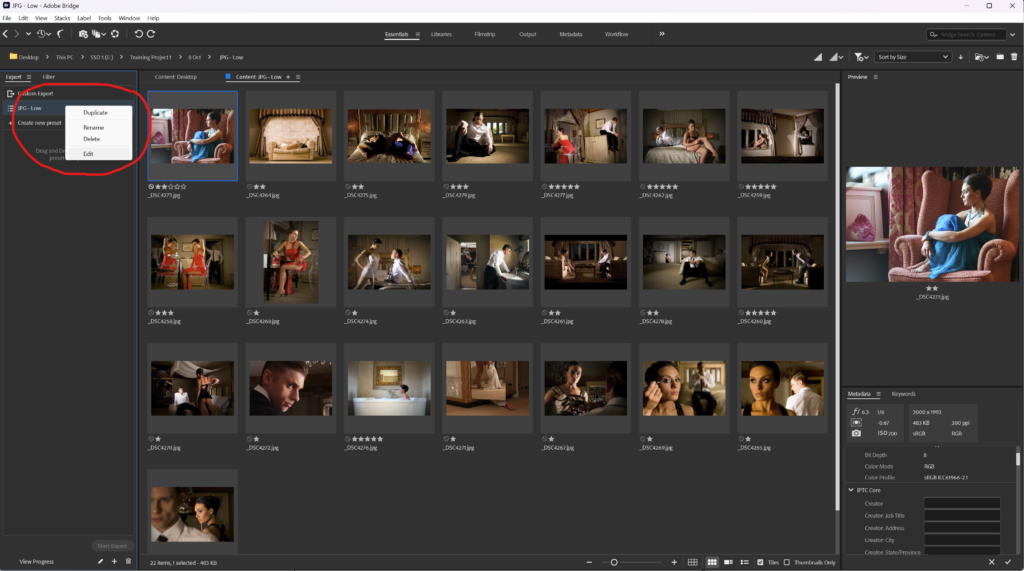
Once you have created your JPGS, we want to double-check that they are all under 500kb in size so there are no problems with uploading them to the Image Approvals platform. The quickest way to do this is to open the folder of JPGS and sort them by filesize to check what the largest file size is. Make sure you are looking at them in descending order so you don’t accidentally think the smallest file size is the biggest! The quickest way to confirm this is to change your workspace from thumbnails to list view.
Step 5: edit your preset when saving to a new location
If you want to convert more RAW files to JPGS, you can simply drag and drop these RAW images into the preset you’ve just made too. Just make sure that if you want the JPGS saved to a new folder location, that you edit the preset, change the destination folder, and click save. You can edit the preset by right clicking on it and selecting edit.
The great thing about using the export presets is that you can create and run multiple presets at a time; perfect if you want to create lots of different sets of images concurrently!
How to create JPGS from RAW files using Camera Raw modal in Adobe Bridge
If you have the paid version of Adobe Bridge that comes with a subscription to Photoshop via Adobe Creative Cloud, you’ll have access to the Camera Raw modal. You can use the Camera Raw modal to save copies of images into different file types. This is the way we prefer to convert files at Image Approvals rather than using the Export tab.
The benefits of this method are:
- Images are processed quicker.
- It stops you from accidentally forgetting to edit the preset each time to save to a new folder.
- You can set the filesize limit to 500kb and the export process will automatically create the JPG to the highest quality that fits within this file size and also means you don’t have to double-check your file sizes after.
The only downside is that you won’t be able to run multiple exports at once like you can if you do this via export presets, or resume other tasks with Adobe Bridge.
Open Bridge > Select your RAW files > Right click > Select Open in Camera Raw > Select all of the images using CNTRL/Command+A > Select Save Images > Configure your save options to JPG, limit file size to 500kb, resize to fit H:3000 W:3000 > Save > Done
Need more details?
No problem, we got you! So, the first bit is self-explanatory; open Bridge and navigate to the folder of images you would like to convert from RAW to JPGs.
Select the RAW images you want to convert (you can quickly select all images by pressing CNTRL+A on Windows or CMND+A on Mac) and right click. Select Open in Camera Raw.
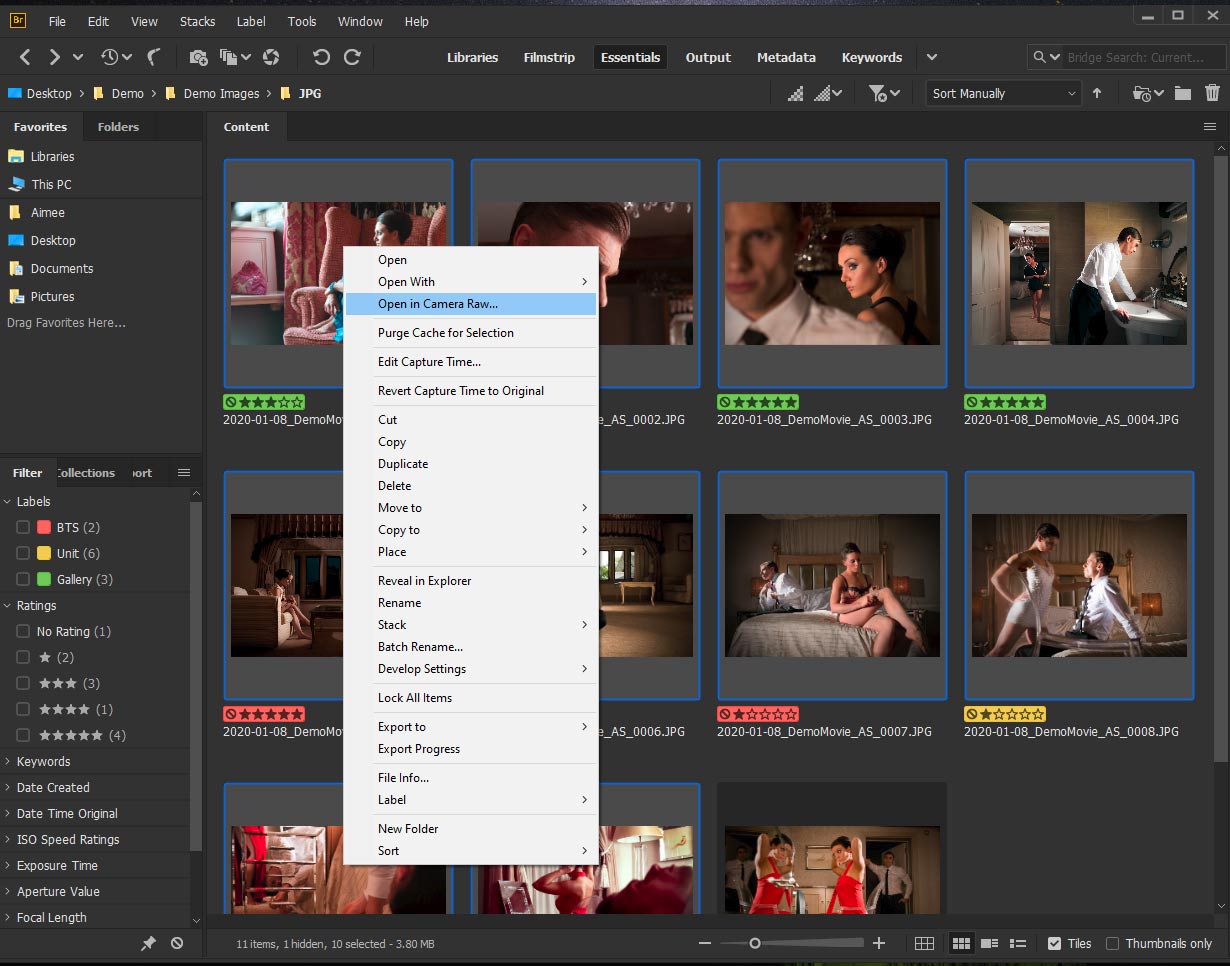
You will then see the Camera Raw modal:
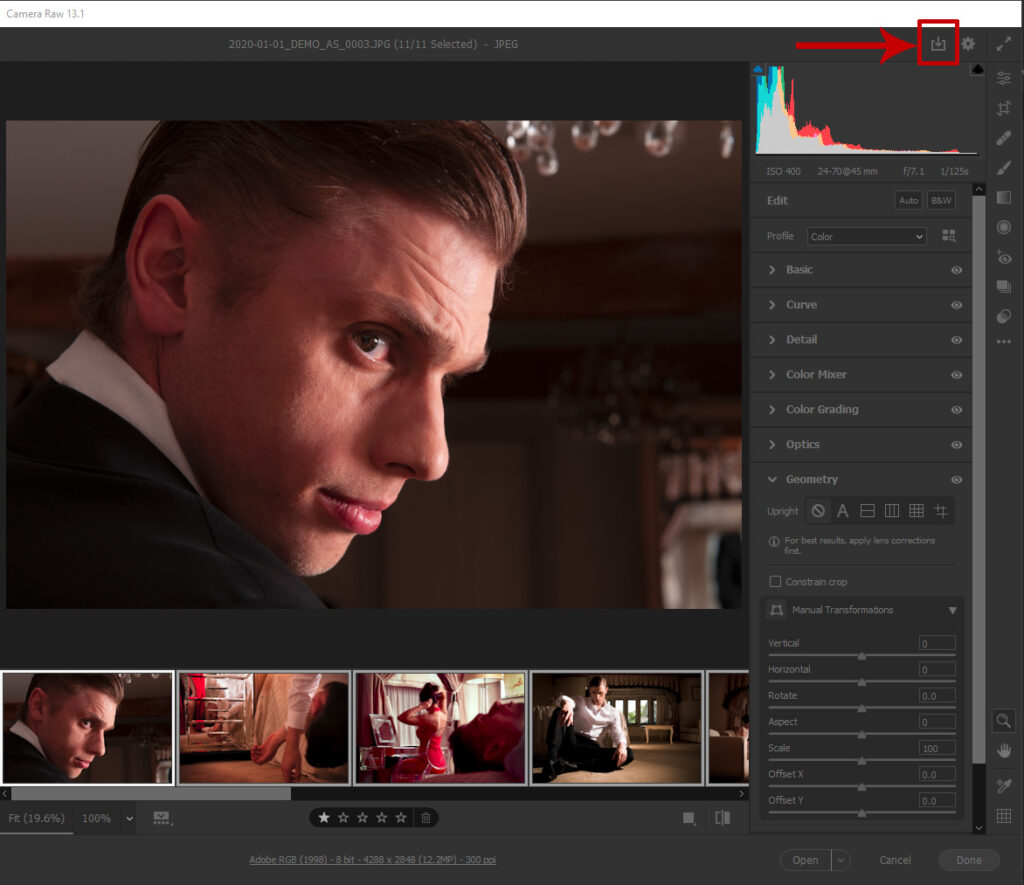
If you want to get creative, you can edit the images using the sliders on the right of the screen before saving the JPGS but let’s ignore that for now.
Instead, select all of the thumbnail images (again you can use the keyboard shortcut CNTRL+A) and click the save icon in the top right corner.
You will then see your save options:
Saving your JPGS
- Select the folder you want to save them to; we recommend you create a new folder in that shoot day for your JPGS.
- Make sure that the file extension box has JPG selected.
To upload your images to Image Approvals, you’ll need to save low res (but still good quality and easy to view) JPGS. To do this, do the following:
- Tick the box, limit file size to and set the amount to 500.
- Tick the box, resize to fit: width and height
- Set the W: and H: boxes to 3000.
- Click Save
Once you’ve done this, you will be returned to the Camera Raw modal where you will see your images being processed in the bottom left of the box. You don’t have to wait for this to finish but you may want to if you are processing a lot of images: it takes a decent amount of processing power to chug through these so waiting for it to complete will reduce the risk of any errors.
You can then click Done.
Want full res JPGS?
Simply follow the steps above but make sure the limit file size and resize to fit boxes are unchecked.